

Table of Contents
Why half guard passing?
The four steps of half guard passing
Upper Body configurations
How our Upper Body configurations dictate our passing direction
Video links to specific techniques
Why Half Guard Passing
According to John Danaher, half guard is simultaneously a great attacking position for the bottom person while also being a great passing position. The success of the bottom or top player is dictated largely by who controls the bottom person’s head and shoulders.
For the purposes of this post we will be looking at strictly chest to chest half guard passing.
In standard guard passing, we battle to pass the lower body of an opponent before fighting our way to control their upper body. Hips first, head last essentially. The transition to controlling the upper body, the ‘cranial shift’ as Danaher calls it is the weakest link in the chain of actions of standard guard passing.
Half Guard passing has a different order of operations: we first fight to control the upper body before transitioning to free our lower body from theirs. Head first, hips last essentially.
The advantage of this is that because the head and shoulders are controlled first, we can exert more control and pressure relative to standard guard passing methods. There are less upper body frames that an opponent can employ once the upper body is controlled which has an impact on the pace of the pass (half guard passing is slower paced and methodical).
The 4 Steps in Half Guard Passing
Establish a strong starting position
Our fundamental starting position refers to the configuration of our limbs and the distribution of our body weight in such a way that is defensively sound and prepares us for passing.
The fundamental starting position must be defensive sound against an opponent’s knee lever sweep, elbow escape and bridging attempts. I would add that it defends against lockdown entanglements as well.
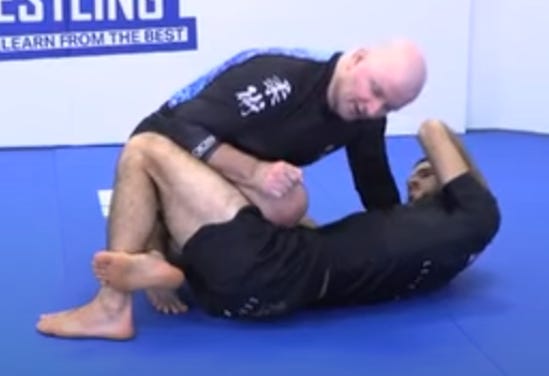
Fundamental Starting Position 1 as espoused by John Danaher

We take a quasi sit out position with our hips, turning them into face our opponent. This shuts down our opponent’s elbow escape option. Our entangled leg has our foot on the ground and our knee off the ground facing outwards. This shuts down their knee lever option. Our free leg is configured to bend 90 degrees such that our foot acts as a bicycle kickstand to resist forces that come into it (bridges)
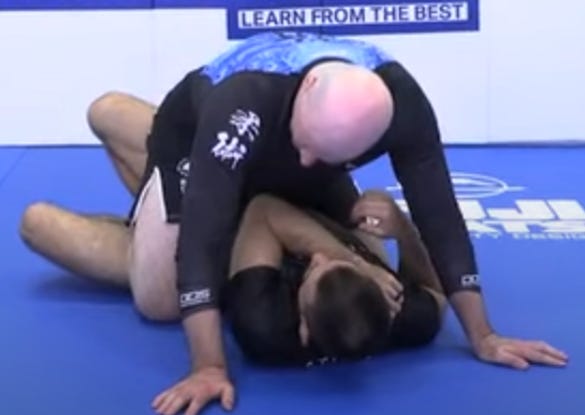
Fundamental Starting Position 2

Our free leg has its knee placed under their armpit and our foot blocks their hip. They cannot elbow escape and we can base out with our free knee to defeat their bridge. Our spine must not be curved like a hunchback otherwise we will lose top position when an opponent bridges into us. This configuration and distribution of our body weight means we cannot easily be knee levered even if our trapped knee is on the ground. The trapped leg is angled perpendicular to their legs which prevents lockdown entanglements.
Free our knee from their control
We operate by incrementally freeing our lower body from theirs, starting with our knee. Whichever method we use to pass, it always involves freeing our trapped knee as the intermediary step.
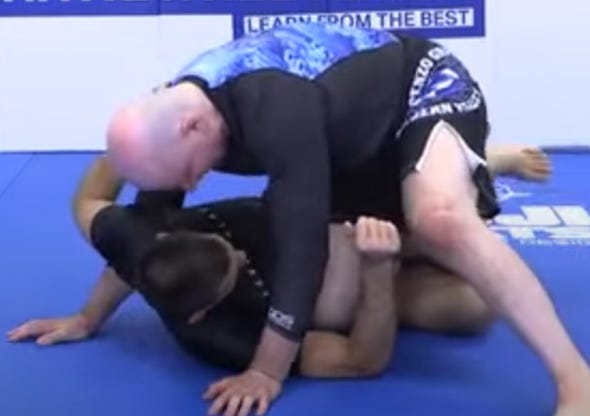
Place our knee on the floor at either hip of our opponent
See picture below. Our knee is placed outside their hip such that each of their hip bones are wedged by our knees. We call this three quarter mount (as our ankle is trapped still)
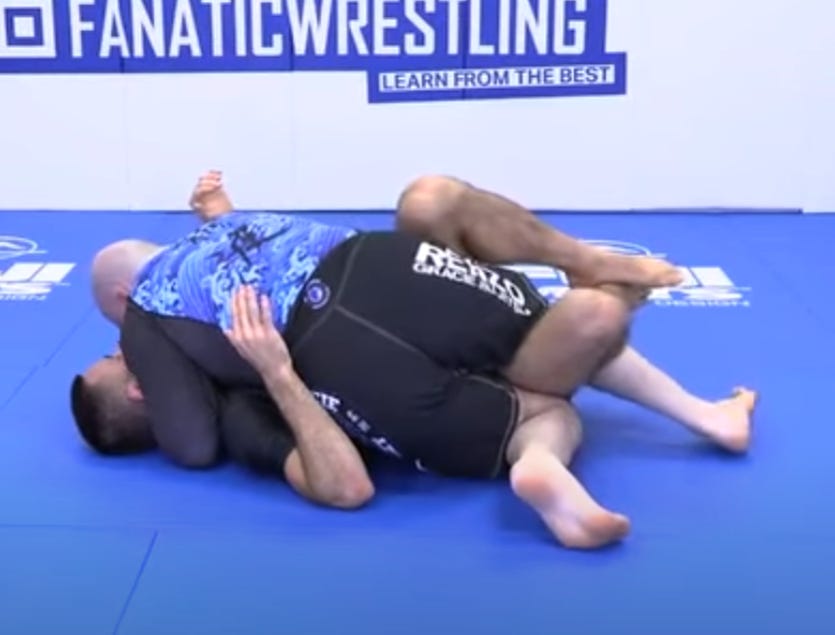
See picture below. Our knee traverses across their torso and ends up outside their hip. We call this three quarter side.
Free our ankle
Our last hurdle is to free our ankle to complete the pass. Please refer to the video links at the end of the post for demonstrations.


Upper Body Configurations
There are several ways we can connect to our opponent given the situation we find ourselves in at the outset of passing. I am specifically talking about how we connect to their upper body with our own upper body. A few definitions before we proceed: Near side means the side of their body you first encounter when making connection from a particular direction. Far side means the side that you had to travel a greater distance to connect to.
Here is a list of all possible upper body configurations:
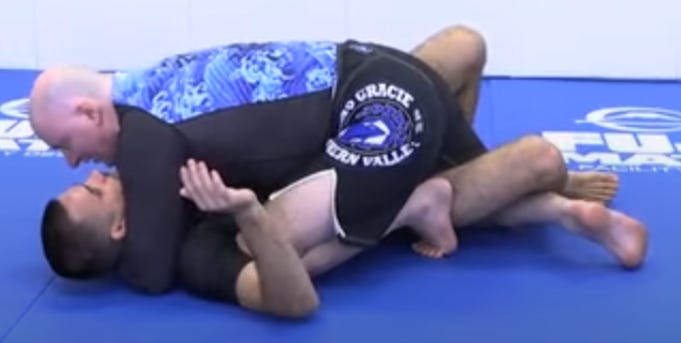
Crossface and far side underhook

This is by far the most commonly used form of upperbody control.
Far side underhook and nearside headblock

We substitute our crossface arm with our head to serve the same purpose which means we have one free limb to help us pass with.
Near side underhook (headblock optional)

We usually enter into half guard passing with a nearside underhook when they are on their side in half guard. We take a nearside underhook from this situation and return them to the ground and start our passing there.
Double underhooks

The king of all upperbody controls. Your opponent’s arms are greatly out of the equation.
Crossface only

Sometimes you cannot get either underhook or you lose the far side underhook. This is when operating with just the cross face and your now free hand is valid.
Reverse Crossface only

We do this when we switch our hips and face our opponents legs. The reverse crossface serves the same purpose by restricting movement of their head.
Reverse underhook only

We do this when we switch our hips and face our opponents legs. The reverse crossface serves the same purpose as the under hook by denying our opponent inside position and their underhook.


How our Upper Body configurations dictate our passing direction
How you pass a half guard depends on what upperbody grips you have. These rules exist because your opponent may or may not have an underhook of their own. If they do, it allows them counter offense should we fail to follow these rules.
A good UNIVERSAL RULE to follow is that if you have only one underhook, you never pass to side control on the same side as it. I say this because I see confusion when people are in 3/4 mount or 3/4 side wondering which direction they should end up in.
Crossface under hook is the most commonly seen combo and this allows you to pass in 2 directions, to mount or side control on the side of opposite of our underhook.
Only double underhooks allow you to pass in 3 directions: mount, side control near side or side control far side.
If you only have a crossface, you will likely be freeing your knee into 3/4 mount and from there you must obtain an underhook to finish the pass, refer back to the universal rule when it has been accomplished.
Links to Video Resources
If you are after specific techniques, you are better off watching these videos below than reading a wall of text written by me.